Chicken & Chickpea Stew

Again, here I am wondering where the heck the time went, and why I can never remember to take pictures of the process when I’m inventing things in the kitchen (or just plain cooking up a storm). Two new cakes at the weekend, and a completely new Chicken Thing, and do I have any photographic evidence? I do not.

On the other hand, I’m not sure there’s any way to make the Chicken Thing look attractive, so perhaps that’s just as well.

Delicious though. Warming, tasty, filling, and (special bonus) incredibly easy. I’ve been seeing recipes for Chicken & Chickpea this and that go floating by, and decided just to make one up. Amusingly, I think I’ve reinvented the wheel – but no matter – dinner was needed, and this definitely hit the spot on a miserably rainy day.

Ingredients:
400g boneless chicken chunks
1 can chickpeas
1 can chopped tomatoes
3 cups (ish) soffrito (chopped carrots, celery, onion – I cheated and used a pre-prepared bag from Waitrose)
2 cloves garlic, crushed (or a tsp of garlic powder)
2 tsp Baharat spice*
salt & pepper
a splosh of cooking oil

Method:
* In a large pan, heat up the oil and fry the chicken chunks. Try to sear them golden on all sides, more or less. Take them out and set them aside.
* Add the soffrito to the chickeny oil and fry for a few minutes, til the veg starts to go soft and translucent
* Add the chicken back in, and the spices, and stir it all together
* Add the (drained) chickpeas and the can of tomatoes
* Fill the empty tomato can with water and pour that in too
* Stir well, bring to a low boil then turn the heat down and pop a lid on the pan
* simmer for as long as you can stand it. I let mine seethe away for a couple of hours, stirring occasionally. You could probably also do this in a low oven.

It doesn’t really need any accompaniment, to be honest – the dense chicken and the earthy chickpeas and the veggy background are sort of complete. Even the favoured Crusty Bread would be a bit redundant. But, as you please.

* Baharat is a middle eastern spice blend. You can probably find it in most large supermarkets (mine’s the Bart version) or fake it by using a mixture of cinnamon, cumin, coriander and paprika. It’s fantastically aromatic and a bit hot. The house smells amazing!


Roasted Tomato Sauce

Where does the time go….?As usual, I’m behind with my Nom Fu obligations. I plead the general contrariness of life. I haven’t stopped cooking – I just stopped remembering to blog about it!

Still, I remembered in time to grab my camera for a foray into the unknown today. The subject of today’s experiment was in fact, driven by necessity. I grew tomatoes this year. They entirely refused to ripen on the plant, and as the days drew in and the weather threatened frost I picked a huge number of green tomatoes and put them in a bowl on the windowsill in a hopeful sort of way. Then I forgot about them. And they ripened.

So I had a large number of ever-riper tomatoes. I am not really much of a tomato user, to be honest. Canned ones in chili and the like, yes. Tomato puree, sure. The odd tomato in a salad, why not. I gave at least half of them away. But over a kilo of super ripe tomatoes that needed to be used right now? Panic…. Then I thought – I know! I’ll make a lovely roast tomato thing out of them, and freeze it, and it will be yummy for soup or chili later in the year. Right? Right!

So with no further ado….

Simplez.

The ‘ingredients’? Just over a kilo of tomatoes. An onion. Some lovely big garlic cloves. Not worthy of a proper ingredients list as this could be more or less anything you fancy – the tomatoes, however, are the point.

I sliced them all in half, cut out that greeny pithy core bit, and popped them into a deep-ish pan. Peeled the garlic cloves and popped them on top. Sliced the onion likewise. Gave it all a sprinkle of salt and a good spray-drizzle of oil, and a few Herbes de Provence for good measure.

The pan then went into a 200C oven for 45 minutes. It came out looking like this:

I put a foil hat on the pan and left it for about half an hour, and then went back and slipped all the tomato skins off. You can just pinch them off at this point. Any that stick, just squeeze the pulp into the pan and discard the skin. Easy. Then decant the whole lot into the container of your choice and have at it with a stick blender. A lot.

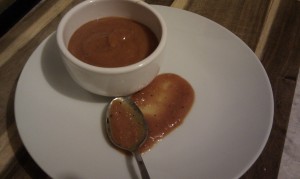
Result:

It comes out thick and splodgy, very like a thick ketchup. The flavour, however, I found rather disappointing. Tomato-blah, with an edge of charred onion that should have been rustic and delicious, and sort of wasn’t.

I could add a bit of sugar and vinegar, but then it would be rather ill-suited for use as an ingredient in other things. Still trying to decide what to do with it – I’ll probably bung it in the freezer anyway, simply because it’s a Home Grown Home Made Thing and I can’t quite bear to chuck it away; I expect I’ll ensoupify it later in the year. With the addition of more tasty ingredients, it would make an okay base.

Chocoranginger Cupcakes

Baking therapy, it’s like retail therapy but less painful for your bank balance and usually with nommier results. However, it is somewhat dependent on whatever you have in your cupboard, otherwise you have to go shopping and then it turns in to retail therapy anyway.

The thing is, given I haven’t done any baking in a while, I was a little understocked in certain areas, and didn’t have all of the ingredients needed to make any of the recipes that I could find.

So naturally my only course of action was to take one of the recipes that I had most of the ingredients for, and then Make Stuff Up.

Ingredients
CAKE
120g plain flour
140g caster sugar
1 tsp baking powder
2 tblsp cocoa
2 tsp ground ginger
40g butter, softened
50g dark chocolate, melted (I used 70% cocoa)
1 egg
125ml orange juice
30g stem ginger, cut in to small chunks
50g dark chocolate chips

GLAZE
3 tblsp caster sugar
orange juice – enough to make it go to a thick syrupy consistency for drizzling

FROSTING
125g butter, softened
250g icing sugar
1 tblsp cocoa
3 tblsp orange juice
50g dark chocolate, melted (I used a mix of 90% and 70%)
30g crystalised ginger, cut in to teeny tiny chunks
50g dark chocolate chips, for decoration

1. Preheat the oven to 170C/325F/Gas 3. Line a 12-hole muffin tin with paper cases.

2. Stir together the flour, sugar, baking powder, cocoa and ground ginger. Add the butter and mix until combined. (May require the butter rubbing in to the dry ingredients as the ratio leaves things a bit dry at this point.)

3. Whisk the melted chocolate, egg and orange juice together in a jug.

4. Stir the chocolate mixture in to the flour until just combined.

5. Add the stem ginger and chocolate chips and mix in until distributed evenly.

6. Spoon the mixture into the cases and bake for 15-20 minutes, or until risen and golden-brown and a skewer inserted into the middle comes out clean. Remove from the oven and set aside to cool for 10 minutes.

7. For the glaze, mix the orange juice and sugar together to form a thick syrup. After the cupcakes have cooled for 10 minutes, and whilst they are still warm, drizzle the syrup over the top. Leave cupcakes to cool completely.

8. For the frosting: Beat the butter until light and fluffy. Add the icing sugar and cocoa and stir in carefully. Beat for a further 5 minutes. Beat in the orange juice, melted chocolate and crystalised ginger.

9. Decorate cupcakes with the frosting then sprinkle on the chocolate chips.

Outcome rather yummy. Though having attempted the first one with fingers I’d say they definitely benefit from plate/fork approach. Couldn’t really taste the orange, it was overpowered by the ginger. Only had orange juice to hand though, possibly orange zest would bring it to the front a bit more.

August: Awesome Pie

Ok, so this technically isn’t a new recipe for me. But several people have asked for it and in order to get myself back on track as far as monthly posts go, I’m going to go with this – because, well, at one point it was new, and I do have a TARDIS.

This recipe has been in my family for years. Two years to be precise, when I found it on teh intarwebz and adapted it for my own world dominating needs.

Ingredients
Cow bits, some. I usually go for rump steak… possibly about 1.5kg, cut in to chunks
Flour, enough to coat the cow bits
Salt and pepper for seasoning
shallots, about 10 medium sized ones, peeled and chopped in to quarters
button mushrooms
carrots, peeled and cut in to chunks.
garlic puree, 1 tblsp
tomato puree, 2 tblsp
Dark ale or stout, 500ml
Beef stock, 500ml
Fresh thyme, about 3 sprigs
button mushrooms
puff pastry (I get the prerolled stuff from the supermarket)
egg, beaten

1. Mix the salt and pepper in to the flour, then add in the beef and mix it up until the beef is thoroughly coated.

2. In a large hot pan (one that has a lid), brown the beef in batches and set on the side.

3. Add some more oil and add the shallots and carrots and stir for a few minutes. Add the garlic puree and tomato puree. Add the ale. Enjoy the bubbles.

4. Turn the heat down and return the meat to the pan, mixing everything together thoroughly. Add the beef stock and stir some more.

5. Add the thyme and button mushrooms. Cover and simmer for 2 hours.

6. Preheat oven to 170C (or whatever your pastry instructions suggest). Transfer to pie dish and top with pastry. Brush egg over pastry to glaze.

7. Put in oven for about 25 minutes or until pastry is golden brown.

July: Quite Nice Carrot Cake

I found a recipe called Yummy Scrummy Carrot Cake – how could I possibly not try and make it?

Ingredients
CAKE
175g light muscovado sugar
175ml sunflower oil
3 large eggs, lightly beaten
140g grated carrots (about 3 medium)
100g raisins
grated zest of 1 large orange
175g self-raising flour
1 tsp bicarbonate of soda
1 tsp ground cinnamon
½ tsp grated nutmeg

FROSTING
175g icing sugar
1½-2 tbsp orange juice

1. Preheat the oven to 180C/Gas 4/fan 160C. Oil and line the base and sides of an 18cm square cake tin with baking parchment.

2. Tip the sugar into a large mixing bowl, pour in the oil and add the eggs. Lightly mix with a wooden spoon. Stir in the grated carrots, raisins and orange rind.

3. Mix the flour, bicarbonate of soda and spices, then sift into the bowl. Lightly mix all the ingredients until combined and evenly distributed through the mixture. The mixture at this point will be fairly soft and runny and look an awful lot like vomit – try not to be disturbed.

4. Pour the mixture into the tin and bake for 40- 45 minutes, until it feels firm and springy when you press it in the centre. Cool in the tin for 5 minutes, then turn it out, peel off the paper and cool on a wire rack.

5. Mix together the frosting ingredients in a small bowl until smooth – the icing should be about as runny as single cream, this will require a lot of adding a bit more icing sugar, then a bit more orange juice, oh no, too much, a bit more icing sugar then… until you get bored. Set the cake on a serving plate and make a mess of the kitchen whilst trying to drizzle the icing across it in an attractive diagonal pattern.

All in all this was quite nice, but not the yummy scrummy that had been promised. It was very light for carrot cake, which was nice, but all the guinea pigs were disappointed by the lack of cream cheese frosting. If I make it again, and I might, because it was quite nice, I’d probably go with cream cheese.

Pork & Apple Pie

Chilly grey weather means PIE!

Actually, what happened was that I had pork shoulder in the fridge, and no desire to make chili. (Makes a change!) So I improvised, rummaged in the fridge, found some things, and made up a pie.

Ingredients:
500g diced pork shoulder
2 large carrots
1 large onion
1 medium Bramley apple
2 sprigs thyme
1 sprig rosemary
1 pint ham stock (I used a cube -feel free to use homemade pork stock if you have it!)
couple tbls flour
salt & pepper
1 package pastry for pie crust (or make your own, if so inclined). I used shortcrust but puff would be good too.

Method:
* Peel and chop carrots into large chunks
* Peel, core and chop apple into small dice

* Peel and chop onion
* Sort diced pork and cut into same-sized chunks
* Pop the flour, salt and pepper into a big ziploc bag (or similar). Add the pork and shake it all about to coat the pork thoroughly.

* In a large saucepan with a fitting lid, heat a little oil and fry the pork – in batches if necessary – until browned on all sides. Remove from pan and set aside.

* Add a little more oil to the pan if required and fry the onion til translucent.
* Add the apple and carrots and fry a couple more minutes
* Add in the pork and stock and stir well.

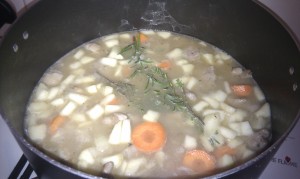
* Lay the herb sprigs on the top, put the lid on the saucepan and turn down the heat.
* Let simmer for half an hour, then take out the herbs and stir well.
* Continue to simmer for another 1.5 hours or so, stirring every so often to make sure nothing burns.
* At this point you can a) nom this as a stew, b) let cool and freeze portions, c) make a PIE!

To pie-ficate:
* Put the nommy meat mixture in a pie dish
* Cover with a pastry lid
* Cook accordingly (usually about 25 mins at 190C or so)

Pie, but not as we know it.

OK so it looks like hell, but you know what? It was delicious.

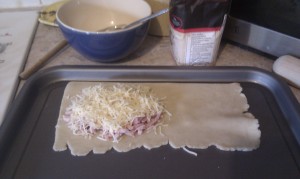
I also had pastry left over, so I made a couple of little ham and gruyere pockets. Perfect.


Nom.

Chili and Rice

As I attempt to recreate the nommiest of my fellow Nom Bloggers dishes, I am shocked at how I never attempted this before.

Ingredients:

Red and Orange Pepper
Tomato Paste
Can of Mixed Pulses
Basmati Rice
Oregano
Garlic
Jar of Pasta Sauce
Chicken Stock Cube
Carrots
Celery
Tin of Sweetcorn
Tabasco Sauce
Red Onion
Cumin Seeds
Steak Mince
Butter
Oil

Rice:

* Measure 2 cups of rice into a sieve and rinse well, really well.  Allow to drain.
* Boil the kettle
* Put a knob of butter in your rice pan, crumble your stock cube into it as it melts, stirring it all in.
* Dump your now clean rice and stir well until it’s all gleaming with buttery-stock goodness.
* Keep stirring and frying for a few moments.
* Add 2 and a half cups of hot water to the rice and stir it all around well, ensuring none is sticking to bottom or sides of the pan.
* Taste the liquid for salt and add if necessary. When it’s boiling, put on the lid and move to lowest heat. Leave it alone for 25 minutes. Alone, I said!
* Have a peek and sneak some out and try it. If it crunches, put the lid back down and leave for another 5 minutes and then check again.

Red Chili:

* Chop all your veg, fairly small.
* Open the tins of mixed beans, drain of the icky stuff, fill with water and shake and rinse the beans. Then rinse again and again.
* One more time for luck. In your chili pan, blob some oil in and throw in the onion, carrots and celery, frying until translucent.
* Add the mince, stirring it to break it up until browned.
* Add a squeeze of tomato paste, stirring it into the meat.
* Add your garlic and stir.
* Add your herbs, spices and tabasco sauce now and stir again.  Be careful! Add a little, stir well and then taste. Only after that add more if you think it needs it!
* Add the jar of sauce and mix well.
* Add the beans and rest of the vegetables and stir.
* Bring back to the boil and give a good stir.
* Turn the heat down and let simmer for at least half an hour, keeping an eye on it to make sure doesn’t dry up.

Dish up the rice, slop some of the chili on top and add some grated cheese to finish!

June: How to get the husband to eat fish

So, the husband hates fish. Hates it. Unless he’s stabbed it himself whilst diving – in which case it’s just about fresh enough to be tolerable. Unfortunately I don’t dive and am more likely to stab myself than whatever I’m aiming at if given a sharp implement. So I paid some men to stab a fish for me and cooked it on the same day. The hubby said he’d at least try whatever I cooked up…

Ingredients
1 extremely large cod fillet, cut down to 2 nice sized steaks.
1 chili
3 spring onions
2 stalks of lemongrass
2 tblsp creme fraiche
1 lime

1. Preheat oven to 170C

2. Chop the chili and spring onions and put in a bowl. Add the juice and zest of the lime and mix thoroughly.

3. Make a small foil parcel for each fish steak. Add a lemongrass stalk to each and then place the steaks on top.

4. Add the creme fraiche to the chili mixture, stir well, then divide between the parcels.

5. Cook in oven for about 20 minutes.

6. Serve with vegetables and stuff.

And, in the end, hubby not only ate it, but said it was lovely 🙂

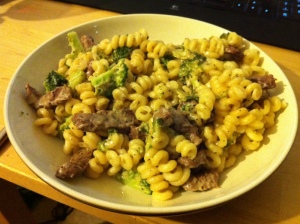
May, no really it is: Beef and Brocolli Pasta Thing

This is a great one for when quick and easy but nommy food is needed. It only takes about 15 minutes total.

Ingredients
Pasta (100-150g per person)
rump steak
brocolli
Boursin (the peppery one works particularly well)

1. Put the water on to heat for the pasta.

2. Slice steak in to thin strips. Chop brocolli in to small pieces.

3. When the water is boiling, put the pasta on to cook.

4. Put some oil in another pan. Once hot, add the beef and stir fry until just starting to brown. Add the brocolli. Stir fry for a couple of minutes then add the boursin. Stir until boursin is melted.

5. Drain pasta and then add to beef and brocolli.

6. Mix thoroughly and serve.

7. Nom!

Italian Style Pork Stew

The ingredients appearing in this dish are:

5 Pork steaks – diced quite large
1 Courgette – diced
1/3 Marrow – diced
2 Sticks of Celery – diced
4 Baby Sweet Orange Peppers – diced
1 Red Pepper – diced
3 Cloves of Garlic – crushed
1 Large Jar of Pasta Sauce – I used a tomato and chargrilled vegetable one
Olive Oil
Salt and Pepper


Having prepared our guest stars, I poured some olive oil in a large casserole dish, chucked in the squished cloves and added some salt and pepper.  Then I introduced the pork to the dish and made sure all the chunks were coated in the oil and because that was so much fun, I did the same with the vegetables.  It smelled wonderful and looked very pretty.

Unfortunately, the prettiness did not last long as the jar of sauce was added and everything was giving a stir, trying very hard not to slop things out the dish. I went a bit mad with the water, thinking that there wasn’t enough sauce.

A rather horrible problem occurred at this stage.  Apparently, the lid we had was not the lid for this dish so we cracked on using tin foil.

And into the preheated oven, the dish went.  Approximately 170 degrees which caused another panic until I found what gas mark that was!  It stayed in for almost two hours with me occasionally panicking and having a poke and a stir.

This, like the ugly duckling in the story, turned into a swan.  A particularly tasty swan.

It was served with crusty bread, mashed potato with cheddar and mashed swede, carrot and sweet potato.

Lessons learned:

Buy more sauce!
Don’t panic and use lots of water.
Make sure you can find the right lid.

Great things about this dish:

It seems like you could get away with whatever vegetables you wanted.
Really easy to do – chop, mix and leave.
Really tasty!

Would serve four hungry people easily.

Previous Older Entries